
- Hue is the chroma. This is the generic name of the colour: blue, red, yellow, etc.
- Value: how light or dark is the colour? Value is measured by reference to the grey scale. Dark tones, mid-tones and light tones refer to the value of a colour.
- Intensity: this characteristic describes the brightness or strength of the colour. The two extreme on the intensity scale would be bright at one end and muted at the other end. Practically, you can mute a colour by mixing it with its complimentary colour.
In this article, we concentrate on values. This creative exercise will help you to become more conscious of values and teach you how to simplify your vision of tones.
Material
- Photographs cut out in newspapers or magazines (black & white photographs work best, but colour photographs work well too)
- A black marker (or any one with dark ink)
The Exercise
The exercise consists in blackening the shadow areas of the photograph in order to obtain, at the end, a pure black and white drawing.
You cannot use hatching for mid-tones. This is a binary representation: an area is either black or white. The rule here is that a shadow “on the dark side” becomes black.
This exercise is more difficult that it seems at first. Here are 5 tips to help you along the way:
- To make the exercise easier, select photographs with good contrast, where shadows are well defined. Avoid dull weather photographs or foggy ones.
- Go first over the darkest areas of the photograph, which are already black or almost black.
- If you see some dark lines (for instance the eye lines in a portrait), mark them with your black marker.
- For areas that gradually fade from light to shade, determine first the border (e.g. at what point the shadow goes “on the dark side”) and trace it with a line. Then blacken the shadow area.
- If you are in trouble and cannot decide where to draw the line between a light and a dark area, squint. This removes the mid-tones and the dark zones will appear.
Examples
For the first example, I used a black & white portrait of the fashion designer Yohji Yamamoto that I found in a magazine.
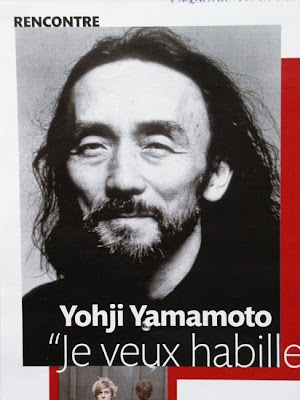
Portraits are good candidates for this exercise as the photograph is often taken in a studio by a professional photographer and under good lighting conditions.
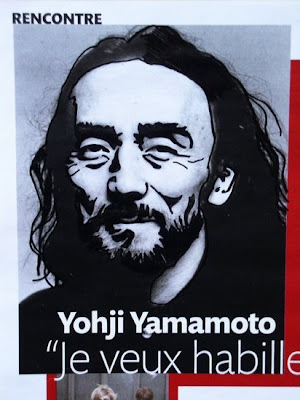
The result is, by definition, more contrasted than the original photograph but you can still recognise the sitter.
The second example uses a colour photograph of a statue. Although the photograph is in colour, it is almost monochrome and therefore suitable for this exercise.

Some areas proved more difficult to handle (like the shadow underneath the faces) because the shadow was fairly light and it seemed a stretch to blacken it all.
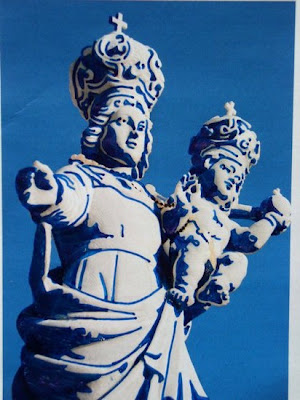
A number of details have been lost when blackening the shadow areas in the dress. This is normal: remember that one benefit of this exercise is to teach you how to simplify your vision of values and build a strong composition. This will be a great help for the block-in process when you paint with oil or acrylic.
There are other exercises you can do to work on tones (like making a linocut), that I will cover in later articles. This one has the advantage to be quick, cheap and can be done almost anywhere, provided you put your hand on a newspaper and you carry a pen or a marker.

Drawing Painting technique Creative exercise Colour value Colour tone Color value Color tone
No comments:
Post a Comment