Monday 31 December 2007

Paint fat over lean – Oil painting technique

Why is this rule important?

The first and foremost reason to paint fat over lean is conservation. If you paint fat first and leaner on top, the different tensions when the paint dries will cause cracks over time. The reason this may happen is that lean paint dries more quickly than fat paint.

Lean paint is the one with less oil or where you have more turpentine than oil. This is the case when you dilute the paint from the tube with some turpentine.

Fat paint has higher oil content. Paints in tubes are mixed with oil. You can make the paint fatter by adding more oil (linseed oil, walnut oil ) or painting mediums.


According to the article on “craquelures” published in the Grove Art Dictionary:
“Cracks that originate within the paint layer, often due to poor technique,
are more likely to detract from the painting’s appearance. Reynolds’s use of bituminous pigments provides many examples of ‘craquelure anglaise’. Premature overpainting, especially of thick layers of oil paint, and not painting ‘fat over lean’ are other common causes.

Before being an art, oil painting is a craft and you should master a few rules: “fat over lean” is one.

If you paint alla prima (e.g. in one session, painting over while the paint is still fresh), painting fat over lean becomes even more important because it is also what allows you to continue layering paint without turning your painting into a patch of muddy colours.

Painting Sequence

Here is a typical way to layer paint following the fat over lean rule:
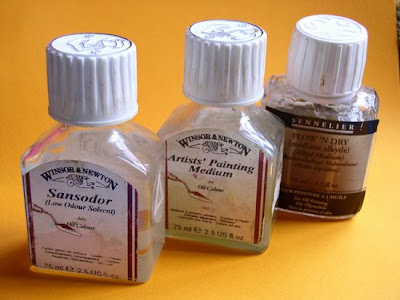
  • Start with highly diluted paint (with a thinner like rectified turpentine or other painting solvent or odourless solvent) to sketch the painting with a wash of oil paint.
  • For the next stage, use the paint as it comes out of the tube, or with a little bit of thinner. Paints have different consistencies depending on the colour and you will be able to adjust with experience how much thinner you have to add. You are blocking in, defining your darkest darks and your medium tones. You save the significant light areas, but don’t paint them as light as they should be at the end. The reason for this is contrast: the balance will be achieved over time, by tuning up or down tones and colours.
  • For the next stage, you can use linseed oil or a painting medium. There are a number of mediums available from art shops and art supply manufacturers developed different ones. It is worth trying them out until you find the one that suit your style in term of consistency, fluidity and stickiness. I prefer mediums that are thick and sticky so that the paint will be mellow with a “good body” and will stick onto the fresh underpaint.
  • By varying the proportion of medium in the paint, you can glaze and apply translucent layers. Glazes form a stable film when they solidify. They should only be done at the end as a glaze will contain a large proportion of medium or resin.


Studio hacks
  • Sometime the oil in the tube will separate from the pigments and come at the mouth of the tube. In this case, it may be necessary to use a painting knife to mix the oil back into the pigments in order to obtain the right consistency.
  • If a particular colour comes out of the tube saturated with oil and you are at an early stage of the painting that requires lean paint, squeeze the paint onto a sheet of paper or paper towel. The paper will absorb the excess of oil. Then, scrap the paint from the paper with a painting knife and put it on your palette.
If you follow the "fat over lean" principle, your oil paintings will last for generations to come.
Related articleA discussion with Catherine Metzger - Conservator specializing in Flemish and Italian Renaissance Paintings at the National Gallery, Washington, D.C. A detailed article on the fat over lean principle and the difference between thinners and mediums by Sanders-Studio.com.

Thursday 27 December 2007

The Pantheon From the Luxembourg Garden - Oil Painting


I painted this oil on canvas on location in the Luxembourg Garden (Paris), which is where the French Senate is located.


The weather was cold, but not freezing. Because of the rain, all the seats were wet and I had to stand to paint.

The perpective leading to the Panthéon is very effective with the trees on both sides. The tones of the painting are muted because of the grey weather. The green statue creates some interest in the foreground. The tricky part was to make it stand against the dark background of the trees.


The Pantheon From the Luxembourg Garden - Oil on linen canvas (27 x 22 cm) by Benoit Philippe


I used a linen canvas bought just before I went into the garden at one of my favourite art shops in Paris, Maison Gattegno (13, Rue Grande Chaumière 75006 Paris, France). I had my pochade box with me for the rest of my painting gear.

I wish you all the best for the new year to come. Happy 2008 full of art.

Wednesday 26 December 2007

Making MDF Canvas Panels


To make your own canvas panels, you will need some basic material:
  • 6” X 8” MDF panels (2mm thick)
  • Primed canvas
  • Scissors
  • PVC glue
  • Synthetic paint brush (for household paint)
  • Rubber roller (mine is one used for linocut)
  • Newspaper sheets to protect your table
  • Dictionaries or other heavy books
I asked my framer to cut for me fifty 6” X 8” panels using the 2 millimetres MDF that he uses for backing frames. This way, I am sure the panels are the exact dimension.
The canvas is some cotton canvas I bought cheaply at an art shop in Paris. These off-cuts are narrow bands at the end of a canvas roll that the shop cannot use for stretching canvasses, but that are perfect for making you own small canvasses or canvas panels.

Cutting the canvas


I put a piece of MDF on the reserve of the canvas and cut the canvas around, allowing a seam of 3 cm (or one inch).


Gluing the canvas to the panel
I put the MDF panel on a sheet of newspaper and applied the PVC glue with the brush.

I then centred the piece of canvas on the MDF panel and pressed firmly with the rubber roller to ensure there was no air bubble between the canvas and the panel.

I then folded the long side of the canvas on the back of the MDF (without gluing them) because the piece of canvas tended to roll on itself.

The panels were put to dry overnight under a pile of dictionaries.


Gluing the sides
I cut the angles of the canvas so that they would not overlap when folded.

I applied some glue on the side of the canvas and put the canvas panels aside for a couple of minutes. The glue softened the fabric and made it easier to fold. In addition, the glue started to set and became stickier.


The panels were put again to dry overnight under a pile of dictionaries.

Toning the canvas panels
I prefer to work on a canvas toned with a neutral colour. I also like to apply to primed canvas an additional layer of gesso. The following process combines both operations.
In a used plastic container (ice-cream tubs work well for that), I poured some acrylic gesso.

To tint the gesso, I squeezed some Ultramarine blue acrylic paint, the same quantity of Yellow Ochre and half the quantity of Vermillion Hue.


I mixed the paint with the white gesso until I obtained a nice grey.


There was enough tinted gesso to cover 17 panels and I had some left for a first layer on a 14 X 18” canvas I bought.

I let the canvasses to dry and they were ready.

I work in batch to make canvas panels, which saves time and material.


Wednesday 19 December 2007

Sam catching stones - Oil painting

Sam is a good old Labrador and he loves to come in this small pool where he plays catching stones with his master.

This painting is a commission I have been working on for several months and that I just finished.


Sam catching stones - Oil painting (24 x 20") by Benoit Philippe

Tuesday 18 December 2007

Art Quote: Delacroix


«La peinture est le métier le plus long et le plus difficile. Il lui faut l’érudition comme au compositeur, mais il lui faut aussi l’exécution comme au violon.» (Delacroix, Journal 1822-1863 French edition by PLON)

We can translate this as:

«Painting is the longest and hardest profession. It needs eruditions as for a composer, but its also needs execution as for a violinist. » (from Delacroix's diary)


Delacroix's diary has been translated into English and is published by Phaidon.


Saturday 15 December 2007

Troubleshoot your oil painting with tonking


The Problem: too much paint too soon

There are times when you apply too much paint on the surface of the canvas. In this case, two things may happen:
  • You loose control of your strokes. You cannot apply new paint on the existing one because it just “slides” on the surface,

  • You start to muddy your colours.
Ways to fix the problem
Three radical options:
  1. You can scrape the excess paint with a painting knife. The drawback is that you are going to loose the shapes you painted and, while scraping, you will mix the colours on the canvas. This can be a good method if you had a “false start” and want to start from fresh.

  2. You can wipe the excess paint with a cloth wrapped around your index. This can work for local problems, but you will go back to the bare canvas and will need to paint the area again.

  3. You stop there and wait for the painting to dry. This is a safe option, but it may not do the job. The excess paint will create texture and you need to decide whether this fits your purpose. In addition, you may be at an early stage and you want to carry on.
This is where tonking can help.


Tonking is a method to remove excess paint on an oil canvas. It is done by blotting some newspaper sheets on the surface of the canvas, gently pressing the paper onto the wet paint and then lifting the paper. The excess paint will be absorbed by the newspaper sheet and you are left with a workable surface again.

Thick paint has been applied onto a canvas board


The paint is full of medium and becomes difficult to work with


I put a sheet of newspaper on the surface and press gently


The paper is then removed
    After tonking, the canvas is left with a thin layer of paint that can be worked from

  • Tonking works very well when the problem is all over the canvas or on a subtantial part of it.
  • Newspaper sheets work best because the paper is absorbant and will take the excess oil at the same time as the excess paint. You may also use paper towel but beware of the pattern on some of these papers. Don’t use paper tissus which are too thin and will not peel off cleanly.


  • You will loose some of the fine details if you are at that stage of the painting. So, you will need to work again on the painting after tonking.
A little bit of history

The word “Tonking” comes from the name of Henry Tonks, (born in Solihull, 9 April 1862; died in London, 8 Jan 1937).

Henry Tonks was an English painter and draughtsman. From 1887 he studied at Westminster School of Art. Between 1893 and 1930, he taught at Slade School of Art in London. Rex Whistler was one of his students. He originated the tonking technique.


Add to Technorati Favorites


Wednesday 12 December 2007

Fingerprint Your Painting


Biometrics is big in the security world and fingerprints have been used as evidence by the forensic community since 1892. How does that relate to art?

Here is this idea: you can authenticate your painting by leaving your fingerprint in the fresh paint.

If you are prolific and become famous, this could help sorting out your works from clever fakes. As any anti-counterfeiting measure, it would be even more effective if kept it secret. A crazy idea? Just consider this:
  • It is simple enough to be implemented right now if you want to.
  • It costs nothing.
  • It is discrete and will not deface your art
A recent article published in The Sunday Times (December 2, 2007), “Police ‘dust’ paintings for priceless Leonardo da Vinci dabs” explains how the Italian police are looking for Leonardo da Vinci’s prints on two Renaissance paintings. The two paintings in question are La Madone de Laroque and Saint Catherine of Alexandria.


Some experts believe that La Madone de Laroque is by Giampietrino, an artist who worked in da Vinci’s workshop, while others believe it is a work by the master himself. The other painting, Catherine of Alexandria, is believed to be by Giampietrino.

An attribution of one or both paintings to Leonardo da Vinci would mean a dramatic increase of their financial value… Art experts' reputation is also at stake.

The article mentions that Leonardo da Vinci was using his fingers when painting:
“Studies have shown the tips of the artist’s fingers were used to create a soft-focus effect in several parts of the painting, a technique for which Leonardo is famous.

Sometimes using his blood, sweat and urine, Leonardo also blended the still malleable paint with his fingers and palms to create an effect in areas such as a face joining hair. The traces of his fingers are visible only from very close up.”

The police, with the help of the University of Chieti in central Italy and the Museo Ideale in Vinci (Leonardo da Vinci’s birthplace near Florence), have taken photographs of fingerprints on the paintings. They also have a database of 200 incomplete fingerprints of Leonardo da Vinci which have been gathered in the past three years.

The police are going to use the same techniques they use with fingerprints in criminal investigations.

It will be interesting to read their findings.


Works by Leonardo da Vinci

Leonardo da Vinci’s Notebooks
Wikipedia Entry for Leonardo da Vinci


Monday 10 December 2007

Torquay in the rain 2 - Oil painting


I am keeping up with my challenge for my 52 Weeks - 52 Works project . Here is this week installment.

In a recent post, I talked about a quick seascape study I did while in Torquay. I wanted to make a larger painting from the study I painted on location and I have now done so.


Torquay in the rain - Oil on linen canvas (35 X 27 cm) by Benoit Philippe


I took few reference photographs (I always try to take some as back-up), but they were not great as the day was grey and the rain was getting on the camera's lens.

I decided not to use the photographs I took and to work only from the study and from memory.


The format of the canvas and the board were similar. The format of the final painting was small enough to keep the "rough" aspect of the initial study (that would not work as well on a large canvas). To make sure I was not going into to much detail, I used mostly a No. 10 hog flat brush. By painting with bigger brushes while scaling-up the format, I could maintain the same feel as in the original study.


I toned the canvas with a flesh tone colour. I then sketched the painting directly with the edge of the brush. The composition was simple and putting in place the masses directly was not a problem.


There are few differences between the original study and the final painting on canvas:

  • In the final painting, I showed more sky and less sea. I found it gave a better balance to the composition.

  • The colours of shadows on the sea are richer. You can see traces of dark green and ultramarine blue.

  • I used a richer mix with heavy strokes to paint the rocks and the ripples on the surface of the water.

  • For the sky, I used glazes over the fresh grey paint. I added some clear highlights around the trees and the distant coastline so that they stand out.

I hope you enjoyed looking at this painting as much as I did painting it.


Friday 7 December 2007

Travel With Artist Oil Paint

Following my article on travelling with your pochade box, and the end of the year holidays arriving, I thought it would be a good idea to round-up some articles and resources I found on the subject.


Articles online


Material Safety Data Sheets (MSDS) online

One of the essential preparations when you travel with oil paints is to carry with you the relevant Material Safety Data Sheets (MSDS). If customs officers start to challenge the fact that your paint can go on the plane, the MSDS is the best way to convince them.

Not all paint manufacturers make the effort to post their MSDS online (difficult to understand why), so I would like to give bonus point to the companies below for doing so:


Wednesday 5 December 2007

Drawing and Painting Trees


Autumn is a good time to admire trees. Within a month, beeches went through dramatic changes: the green foliage turned yellow, then orange… Now, the brown leaves have started to fall, revealing the structure of the trees. Autumn is a magnificent season. Trees get on the warm side of the palette. Acers are in fire.

From a painter point of view, trees provide structure, verticals in the landscape, pointers to lead the eye of the viewer towards the horizon and reinforce the aerial perspective.

Five points to explore for artists:

  • Learn about trees: go to your library and borrow books on trees. Naming is starting to understand.

  • When drawing, get the overall shape of the tree first: Observe trees at dusk, when the dimmed light flattens the shapes and gives you a general outline. Another way to observe the shape of trees is to look at them in the light. Finally, guide books on trees often have a silhouette of each tree to help you identify a particular specimen.

  • Paint and draw from nature: The same tree will grow differently if it is part of a group or an isolated specimen. Each tree has a particular rhythm, movement, personality. Rely on your observation skills.


  • Paint and draw trees in all seasons: In winter, deciduous trees are bare and it is easy to see the shape of branches. In spring, the leaves bring colours, but the trunk and branches are still apparent. During summer, enjoy the full green foliage. In autumn, catch the riot of colours.


  • Use negative shapes: rather than drawing intertwined branches, concentrate on the shape framed by these branches.

Trees around the year in 4 paintings


Spring


Summer


Autumn


Winter


Monday 3 December 2007

Working In Batch: The Artist Way


Working in batch is a very effective way to save time. According to Mark Forster , the author three books about time management and personal organisation:

“One of the basic rules of time management is that it is much faster to group similar actions together. This rule is the basis of the batching which I advise in Do It Tomorrow.”


Why working in batch?
As already explained, working in batch will save you time. But there is more to it from a productivity standpoint.


Preparation time stays the same, whether you get ready for one action of several similar actions. Some examples will illustrate this:
  • Getting your tools out to apply gesso on painting boards

  • Switching on the computer and starting Windows and other programs

  • Getting you contact list out to make phone calls

Tools and material required are the same for batched items: This is a principle developed by David Allen in his book Getting Things Done: The Art of Stress-free Productivity (also known as GTD). You should group your tasks by context. If you have a section of your to-do list which is called “@call”, you can make all your phone calls at the same time. (Other examples of context: “@errand”, “@studio”, “@computer)

Easier to spot areas for improvement: When you repeat a task several times, it become easier to spot whether your process is efficient and how you could change it. Let’s put it this way: if you only perform a task once, it does not make the great difference if you don’t do it in an efficient way. If you repeat the task 10 times, you should at least notice its inefficiency, you will probably get irritated to the point that you will find a better way.

You get the advantage of training. If you repeat the same task over and over again during the batching process, you will get better at it and more efficient. In some cases, it also removes the fear you have to accomplish certain tasks. If you hate cold calling prospects, making all your calls in one go will ease the pressure. The first call is always the most difficult one.

Save money: When I prepare MDF boards with tinted gesso, I mix a large quantity of gesso tinted with acrylic paint in an old ice-cream tub. I then apply the gesso onto the panels I cut earlier until I use it all. I make sure that I cut plenty of panels to use the gesso I have prepared. If I am left with couple of bear panels, they just wait until I prepare the next batch. This way, I am not wasting any gesso.

What can you work in batch?
Things you do everyday: Leo Babauta from Zen Habits wrote in his article “Haiku Productivity: Limit Your Work Week”:
“Batch. If there’s something you do every day, consider batching it all into one day. For example, I was writing my Zen Habits posts every day, but now I do it all at once. And in truth, it saves me time. You could do that with almost anything. Same thing goes for something you do throughout the day, like email or phone calls. Consider batching tasks like that into one session per day.”


Small tasks

It is a good idea to batch small tasks and do them in one go at the end of the day, when your level of energy is lower.


Apply the batch method to the structure of the task


This idea is credited to Mark Forster who illustrates the point in his article “Similar Actions” with the most rational way to set-up a room for his seminar. I will use instead a personal and seasonal example for artists. It is time to prepare New Year cards for my contacts. Rather than buying cards (or having them printed), I decide to make them using a photograph of one of my paintings. The steps to get this done are:
  1. Print the legend on the back of the card (title of the work, dimension, my name, address of the website) using my computer and printer.

  2. Glue the photograph on the front of the card

  3. Write the card and the address on the envelope

  4. Put the stamp on the envelope
I could go through step 1 to 4 for the first card and start all over for the second card and so on. You realise that it would be much quicker to print all the legends on the cards at once (step 1), then to glue the photograph onto all cards in one go (step 2), etc.

Let’s list some activities that lay themselves well to the “working in batch” method.

Artist’s job
  • Preparing board panels for oil painting

  • Making small canvasses

  • Cutting watercolour paper

  • Varnishing paintings

  • Framing Pictures (or get your frames made)

  • Preparing labels for your works

Art business
  • Buying in quantity. You know you will need ten canvasses of a given size during the months to come: buy them in bulk. You may find a good deal because you buy in quantity. You also save time because you don’t need to run to the art shop each time you want to start a painting.


Photograph: Petr Kratochvil
  • Processing emails: One word of caution, here. Don’t wait until your inbox is overgrown and you can’t see the end of it. Processing emails in batch, once or twice a day in much more efficient than checking it every 10 minutes (unless you are waiting for a confirmation that you get this big commission…)

  • Producing or writing postcards to collectors

  • Updating your website with new paintings

  • Writing posts for your blog

  • Uploading photographs onto your computer
  • Processing your expenses
These are only examples and I would love to hear about your own practice. Feel free to contribute and share your own experience by leaving a comment.

For this to work, you need some minimal organisation, so that you are ready to proceed when you decide to work on a batch of tasks. Here are two examples:
  • Expenses: keep all your receipts in an envelope (one envelope per month if you get many receipts)

  • Keep a list of works that you want to get framed. This way, you won’t forget any when it is time for your next trip to the framer

Related Articles
Further Reading