This article was first published in "Frequency Magazine"– December 2009.
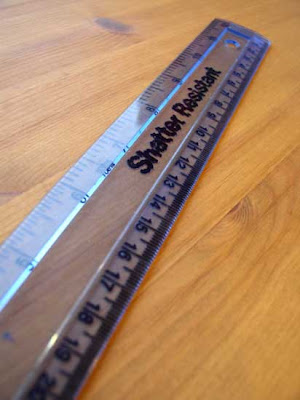
A ruler is a familiar object, part of every child’s school kit and a rather unglamorous piece of office supply, but do not discount this mundane tool and you will get lots of mileage out of it.
To be able to perform all of the techniques described below, you should buy a clear acrylic ruler that is sturdy enough. Some models feature a grid or vertical lines that prove useful to check alignment and draw right angles. A 300 mm ruler divided into imperial and metric will be suitable in most situations while being transportable. Avoid metal rulers that risk marking the paper in some of the uses described below.
- Measuring: This use is obvious, so I won’t spend too long on this. If you work from photographs, taking measurements of key features will make keeping accurate proportions between the different elements in the picture a breeze.
- Materialising the horizon: By placing the ruler on your paper to materialise the horizon, you can visualize how the composition would look. In a landscape, this will help you to decide how much sky or land you want to show.
- Tracing objects in perspective: I would rather draw everything free hand to get a more natural feel, but there is one case where I always welcome the help of a ruler: drawing buildings in perspective. Remember that all lines which are not in the plane of the paper will converge and vanish on a point located on the horizon (could be one or two points depending on the perspective). Verticals remain vertical and this is also something you can check with a ruler.
- Use the ruler as a mahl stick: For oil painting, a mahl stick is used to rest the hand holding the brush in order to paint details without touching the surface of the wet canvas. It is composed of a long thin pole with a rounded pad at the end. You can use your ruler in the same way by having one end of the ruler resting on the drawing board just on the side of the stretched paper while your free hand holds the ruler in position across the paper, a few centimetres above its wet surface. You then rest your hand holding the brush on this improvised mahl stick to paint with accuracy.
- Use the ruler as a hand rest: In this case, the paper is dry and the ruler can rest flat on the paper surface. One reason you may want to do this is to avoid the grease on your hand transferring onto the paper. This is more relevant in hot weather.
- Use the ruler as a guide to apply masking fluid: Rest one edge of the ruler on the paper, hold the ruler at a 45 degrees angle and use the other edge to guide the ferrule of the tool you apply masking fluid with. This technique is useful to reserve light ripples on calm water.
- Paint straight lines with a ruler: This technique is based on the same principle as the previous technique but with paint rather than masking fluid. In order to get the correct position, align the side of the ruler you are going to use as a guide with the line traced on the paper, lift the ruler into position and then proceed as described before. This technique works well to paint boat masts, lampposts and telegraph poles.
- Use the ruler as a temporary mask: Lay the ruler flat on the paper and paint over the edge. When you are done, lift the ruler carefully and wipe it clean with a paper towel. Your colour plane will have one straight edge. It is likely that some paint (in particular if highly diluted) will go under the ruler and the result will not be as clean as with masking tape. This type of accidents makes it an interesting technique.
- Use the ruler as a stamping device: Apply paint on part of the edge of the ruler and use it as a stamp to print a straight line onto the paper. Wipe the ruler clean between applications. This is an effective way to paint dark railings.
- Use the ruler as a squeegee: In this technique, the ruler is used in the same way the operator uses a squeegee (or rubber blade) in screen printing. Apply some colour on the paper, and then hold the ruler with both hands at a 45 degrees angle to the paper and drag the paint down using the edge of the ruler. Wipe the ruler clean with tissue paper as soon as you are done. A reverse use of this technique is to start with a graded wash and then, before it dries, to push the pigments up with the ruler. This will create a lighter area where the pigments have been removed and a darker zone where the pigments have been pushed to.

One last word: Overusing a ruler when drawing your composition may lead to a stiff and rather mechanical look, but use it with moderation or in a creative way and your watercolours will benefit greatly from this simple tool.


No comments:
Post a Comment