Thursday 28 October 2010

An artist’s use of online colour palette generators

There are a number of colour palette generators available online. Just type “colour palette generator” and then “color palette generator” in Google and you will find a comprehensive list.


The most useful generators are the ones where you upload a photograph (or indicate the URL of a photograph) and the online tool generates a palette from the image. I selected the Color Palette Generator on the CSS Drive website for this article.

The first use of the tool, if you are a painter, is to generate a palette from your reference photograph. This gives you a good indication of the colours and hues you could use for the painting. This is interesting because the palette generated may be different from your usual palette. This way, you can grow your colour vocabulary.


A second use of the online palette generator is to create a palette based on the final painting. If you do that with several of your paintings, it may show you your colour bias.

Relaxing at Mevagissey - Oil on canvas by Benoit Philippe


You get even more interesting information when you compare the palette obtained with the final painting with the palette generated by the tool from your reference photograph.


Monday 25 October 2010

Autumn walk in Clouts Wood - my week-end plein air session

On Saturday morning, I drove to the near-by village of Wroughton (Wiltshire - England) to paint in Clouts Wood. The trail starts at the top of the hill and leads into a nice secluded valley. There is a stream and, with the recent rain, the path was muddy.

Here is the finished painting at the end of the session.

Autumn walk in Clouts Wood - Oil on canvas panel (6" x 8") by Benoit Philippe

There is nothing like painting plein air. It is hard to recapture in the studio the atmosphere of a place, unless you sketch or make a small painting to fix your memories.

First I wanted to find the right spot. I had to cross a field where cows were eating some shrubs. One of them started to run in my direction and I had to reach the gate faster than I planned to...


After that, I stopped several times, watching in all directions: your best view may be in your back. There was an old elm with yellow and orange foliage. It was tempting, but I wanted to capture a view of the valley. I crossed the shallow stream, walking carefully on some dead branches.

The Spot below was good. The overcast weather made the colours grey and it would have been difficult just to work from a reference photograph. I shot one with my digital camera, just in case the rain would come.

I sat on my folding 3-legged stool. Not the most stable seat on soft grassy ground...


Ready to paint

I get ready to paint. Colours are laid on the palette and I have a pair of mittens (it's cold and  I need to be able to move my fingers).

Below is the initial under-painting. After that, I did not stop until the end.


I did not see any rambler. The only visitors were a couple of grey squirrels, a noisy bird and a sheep with a black head that watched me from the other side of the stream and then went away.

11:00 a.m. I have finished the painting and head back to the car. I can hear the first drops of rain hitting the leaves.

Thursday 21 October 2010

My guest post on Fine Art Tips: 10 Tips to Bring Visitors to Your Art Fair Booth or Open Studio

I invite you to do read my first guest post on the Fine Art Tips blog from Lori McNee. It is titled
10 Tips to Bring Visitors to Your Art Fair Booth or Open Studio. If you like it, let people know on Twitter, Facebook or by leaving a comment...


Wednesday 20 October 2010

The power of letting things come


Sometimes, you need to let time works for you.

Kafka's Portrait


“You need not leave your room. Remain sitting at your table and listen. You need not even listen, simply wait. You need not even wait, just learn to become quiet, and still, and solitary. The world will freely offer itself to you to be unmasked. It has no choice; it will roll in ecstasy at your feet.”


Franz KAFKA (quoted by Carol Lloyd in “Creating a life worth living")


Monday 18 October 2010

The pink pick-up truck


The pink pick-up truck - Oil on canvas panel (6" x 8") by Benoit Philippe


Friday 15 October 2010

A facelift for my art website

Each time I went to my art website http://www.benoitphilippe.com/ , I knew I had to redesign it. The colour scheme and design looked outdated and amateurish. In a nutshell, there was good content there, but not very well packaged.

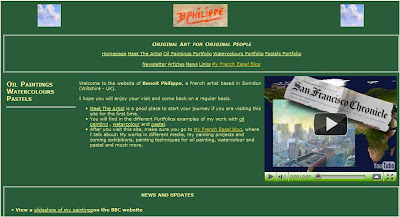
Old design for my painting website


Considering that I wrote my first website only with a basic text editor and wrote it in html and CSS, after buying a couple of books on the subject… it was not that bad. The drawback of this method was the time it took to create it and then to update it. Working this way is very repetitive and prone to mistakes. On the upside, learning to code html and CSS is valuable when I want to create something specific on my website.

The redesign was long overdue. I almost did it in April 2009 and then it fell through the cracks. I picked it up recently and did not let the project go this time.

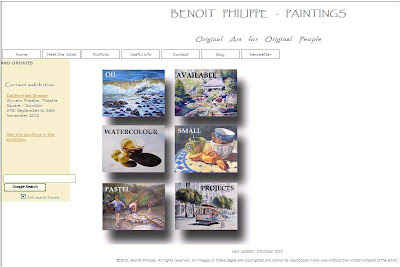
New design for my painting website

The new design

My brief was: create an uncluttered space that let my paintings speak for themselves.
I started with a blank piece of paper. It is tempting to buy a website editing software and just use one of the templates, but your website will look like hundreds of other websites out there. So, I followed the advice of experienced designers: paper and pencils is the best way to start. I just drew the elements on a blank page and tried different combinations until I found one I liked. While doing this, I reviewed many artists’ website, noting what I liked and what I did not like about them.


What is different on the new website?
  • The white background does not compete with the paintings. You can’t get more simple that this.
  • Many of the elements (titles, text and menu buttons) are grey, a neutral colour that again does not distract from the art.
  • The colour scheme is minimal. I worked with three colours: A sandy colour for the side bar, a light camel colour for the links and grey.
  • For the titles, I wanted a font that looked good and was legible. After trying many, I settled for Papyrus.
  • In the portfolios, the gallery consists only of the images, without the titles, medium or dimension of the works. This looks much cleaner and all these details are available for each painting when you click on the image to see a larger version.
I strived to have a consistent layout throughout the website. I also tried to make the navigation as straightforward as possible (I hope I succeeded).


What I added to the website and you should get

After reading many articles on creating an artist website, I added a number of elements on the website.
  1. A Google search box on the homepage. I found the script using… Google.
  2. My photograph in the “Meet the artist” section.
  3. My contact details in the “Contact” section. I also added links to my contents on Twitter, Slideshare and YouTube
The process


The best way to get a project like this done is:

  • Work with checklists. For each page you create, there are a number of operations that you will have to carry out (write the title, list key works, etc.). Unless you use checklists, you WILL forget one step. What also happen is that you will think about one thing you must do or want to add on one page in the middle of creating another page. The best way to deal with this: just add it to your list to get it off your mind.
  • Batch operations. For instance, to create JPG file in web friendly format for each work in Photoshop Element, it is easier to do all the vertical paintings in one go and then all the horizontal paintings.

  • Take small steps until you are done. If I had 15 minutes available on a particular day, I could still create a single page and get closer to my goal.

Testing phase

Check, double check and check again. After I loaded the new website, I navigated it, clicking on all the links. Result? Missing images, broken links and wrong page titles. It does not matter how careful you are, you will miss some steps. Testing is essential. I am sure there are still some glitches I need to take care of.


The tools I used
I used a photo editing software. I have Photoshop Elements 6. It is a great piece of software worth the investment and if you want to buy it, the last version is Adobe Photoshop Elements 8 (PC DVD).

If you are on a budget, GIMP is a good alternative (see below).

To edit the page, I used an open source software called KomPozer (More on this software below). It made the whole process much easier.
Free resources for the creation of your artist website

  • GIMP is a free alternative to Photoshop for photo editing and manipulation. I have not used it but read very positive reviews. If you want to learn more about this software, check out “GIMP Help: Tips, Advice, and Tutorials on How to Use GIMP”, a series of articles on EmptyEasel.com.
  • Kompozer (available Windows, Mac, Linux) is a free WYSIWYG (What You See Is What You Get) editor for web pages and site management software. The program was easy to install and use.
  • Filezilla (Windows, Linux, and Mac) is open source File Transfer Protocol (FTP) client. Kompozer has the capability to load your website onto the server, but this is a good alternative if you want a dedicated FTP software.

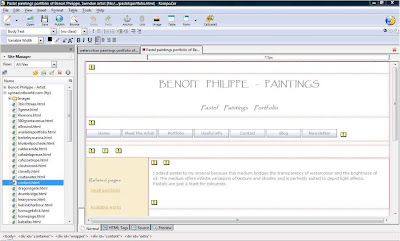
The dashboard of KomPozer

Recommended books

Although I also wrote about software tools in this article, the most important part is the design itself. The following books were a great resource for educating me on design principles:


Thursday 14 October 2010

My French Easel on Twitter

I am sure you noticed a change in the design of My French Easel blog since your last visit... This is because, after playing with the idea for a long time, I decided to go on Twitter.

Twitter let you change the background with your own picture, so I created five or six different ones and settled for the background below.


After that, I found out by chance that Blogger allows you to do the same and to customise your background, colour scheme, etc.

I also wanted to get some unity with my website www.benoitphilippe.com that I just redesigned (more on this soon).

If you are a reader of this blog and you are on Twitter, let me know in the comments section... I would love to follow you.

Monday 11 October 2010

Inviting a guest colour

This article was first published in my newsletter "Notes From My French Easel" – June 2010. 


I have been thinking about the idea of “guest colour” for a while. For oil painting, I like to use a limited palette: Titanium White (Griffin Alkyd), Cadmium Yellow Pale, Yellow Ochre, Cadmium Red, Alizarin Crimson, Burnt Umber, Cobalt Blue or Cerulean Blue, Ultramarine Blue and Viridian Green.


From time to time, I bring along another colour. This is what I call a “guest colour”. I have several reasons to do that.


  • The first reason is that the particular shade is hard or almost impossible to mix from my usual palette. A good example is Turquoise blue.


  • Another time I would bring a guest colour is when the colour in question is prevalent and, rather than mixing a large quantity of the shade, it is quicker and more productive to use it from the tube.
  • I like some colours so much that they were creeping in all my paintings and they began to look too uniform. For instance, Blue Rex is a great blue shade but also very potent. It works well mixed with background colours to push them further towards the horizon. Another colour I was using too much was Sap Green. It is a nice transparent green which is in the midrange and does not have the acidity of other greens. The risk was that I relied too much on it and forgot that I could mix a broad range of green colours with my basic selection of colours. By making Blue Rex and Sap Green guest colours, I treat them with more judgement.
  • Bringing in a guest colour helps me breaking the routine. Because I only bring one or two guest colours for a given painting, I can take time to know them better and get the best out of them.


Monday 4 October 2010

Homage to Philip K Dick

Philip K Dick (December 16, 1928 – March 2, 1982) was an American science fiction writer. He lived in Berkeley, in the San Francisco Bay area, for some times. He wrote many novels (like The Man in the High Castle, UBIK or Do Androids Dream of Electric Sheep?) short stories and essays. Several of his stories have been adapted for the big screen: Blade Runner, Total Recall, A Scanner Darkly and Minority Report.


Homage to Philip K Dick - Oil painting (60 cm x 50 cm) by Benoit Philippe


Rather than painting “another view of the Golden Bridge”, I wanted to make a playful work. This is why I patterned the sky with Space Invaders and there is also a portrait of Philip K Dick hidden somewhere (I let you find it – click on the picture to enlarge it).

For the Space Invaders, I made a printing block.


I first tried to use small foam square that are used as spacer for card making. This did not work well as it was difficult to line-up the squares.

I then made a printing block with some cardboard. It was not perfect but gave me enough to fill the gaps and paint each individual Space Invader with a small brush. The main issue was that when I cut the strips of cardboard with a sharp blade, it created an edge on each side. As the strip was not totally flat, the imprint gave me only the outline in some places.


This painting is part of the series I painted for my Californian Dream Exhibition.